|
Comma Separated and Excel Data Import |
  
|
|
Comma Separated and Excel Data Import |
|
Select Import from the Process Menu or click the Open icon.
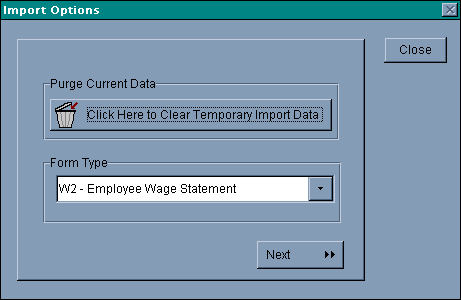
Magtax Import uses a temporary file to hold the data for manipulation before exporting into the Magtax format. Click the Clear Temporary Import Data to empty this file. Otherwise, data will be merged into the file.
Select the appropriate Form Type (W-2, 1099, etc) from the Form Type List.
Press Next to proceed.
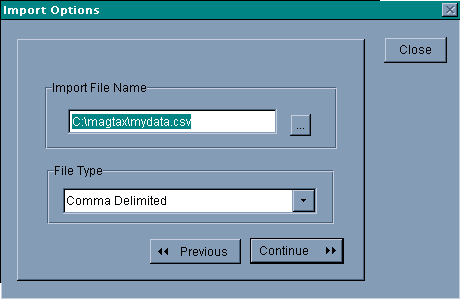
Select the actual data source file by typing in the name with complete path or by locating the file with the "..." button.
Indicate the type of file (how delimited, etc).
Press Continue to proceed.
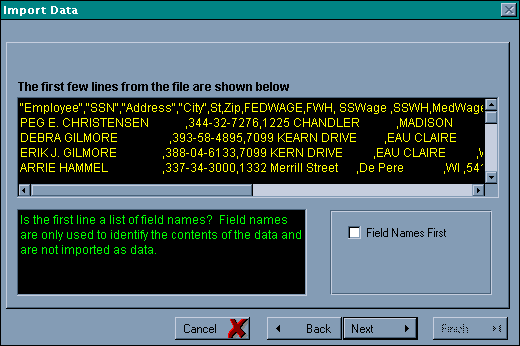
After the first screen describing the process, this screen shows a sample of the data.
Check the "Field Names First" box if the field names are in the data source file.
In this example we would click the button.
Click Next t proceed.
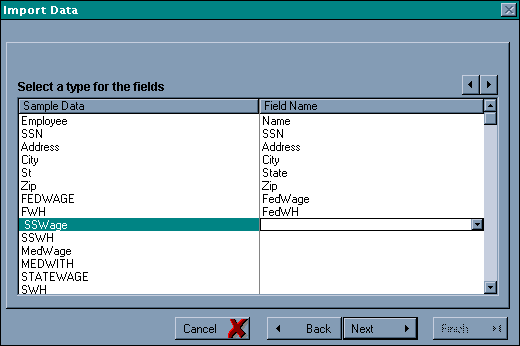
We now need to match the data in our source file with fields in the Magtax file.
Do not leave any blank. Use the Ignore field item to skip a field.
Special Notes:
The are several special "Field Name" options during selection.
Some items have a "- Neg" in their name. This indicates that the item is represented as a negative item in the source data. By selecting the "- Neg" Field Name, the sign will be reversed in the resulting data.
Some software (such as QuickBooks) represents deductions as negatives. Magtax uses all amounts normally as positive.
There is also an item called "FedWages - Add to". Again, some software (QuickBooks again), does not export a Total Wages amount. Instead it only exports a series of Wages that together represent the total wages. Using the "Add to" option will summarize these amounts to determine "FedWages". There are also no fields for State wages, etc. This is handed after import in the Data manipulation tools.
Click Next to proceed.
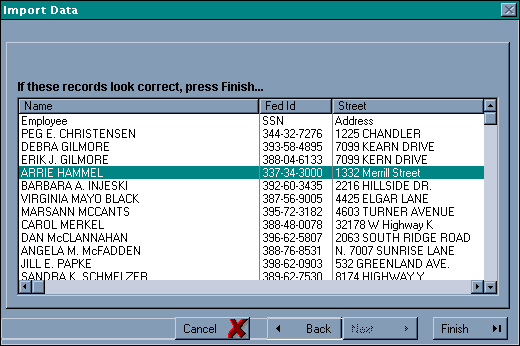
We are now presented with a sample of the data.
Click Finish to perform the import.
Now review your data with the Review function on the Process Menu.